 Hi guys! My husband and I built the sectional above using just 2x4s, stain, foam cushions, and fabric. We posted a video on youtube. Be sure to check it out https://www.youtube.com/watch?v=MfYzlmuRSh4. We were inspired to do this project after we saw Ana White, Here are the items that you will need for this project:
https://www.ryobitools.com/nation/projects/4499 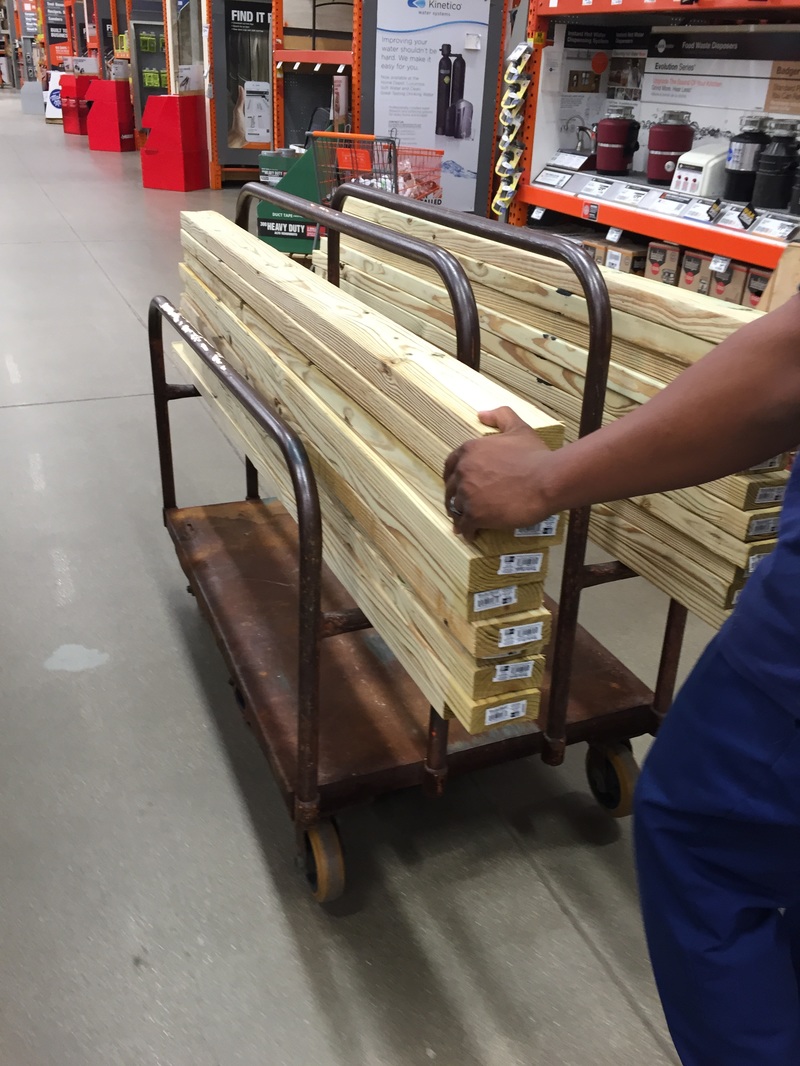 This is my hubby proudly pushing all the lumber he had to cut. The lumber was about $3.47 for a 6ft piece. We used pre treated weather shield 2x4s and after we did our research we wish we would have used cedar! The total cost of the wood was about $118 with tax.  So.. We didnt have a saw horse so we improvised and used chairs. It worked perfectly. Ha! We are planning to get saw horses now since we will be doing more building. 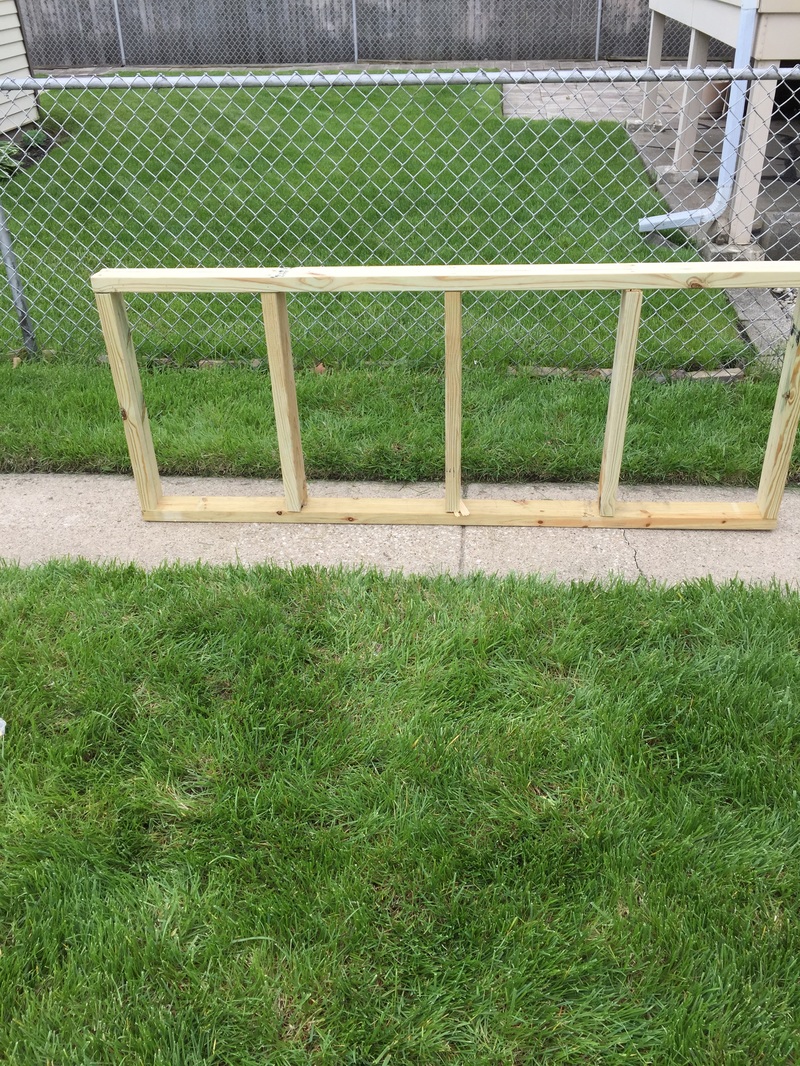 Ahhh the base. It was a good feeling when we saw this part coming toghether. 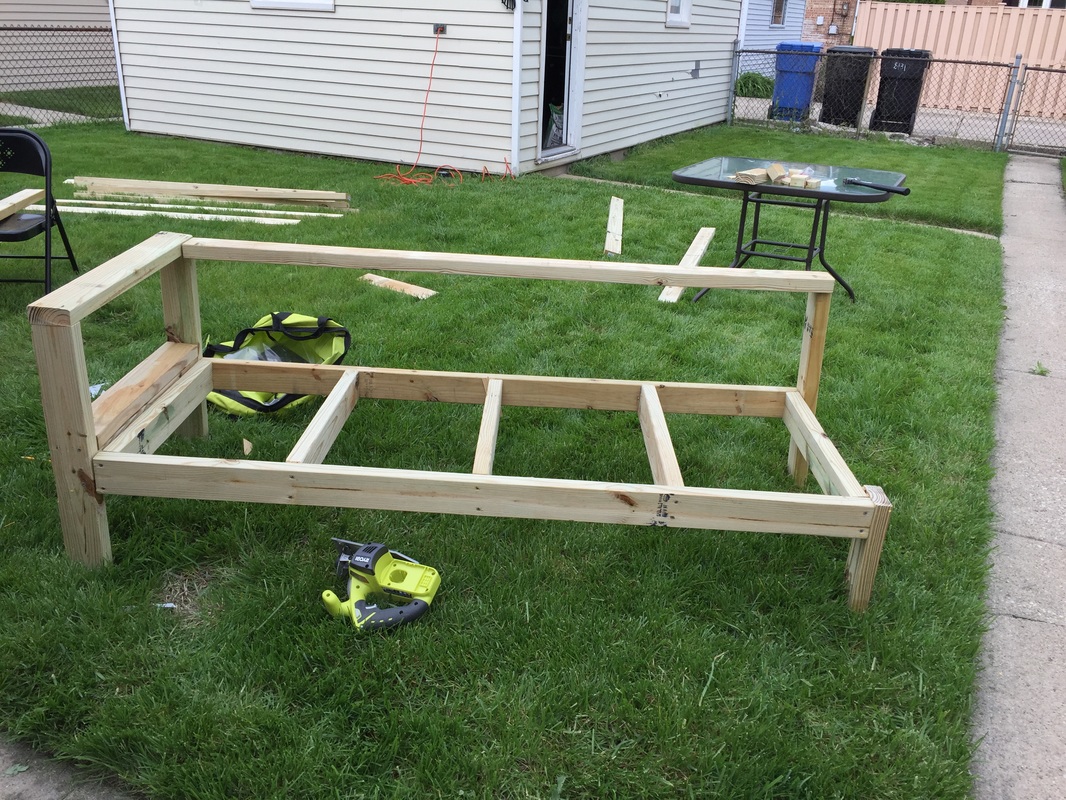 Now we have come to the part where we put on the legs and back support. Assembling the legs were pretty easy as well as adding the back support. I must say that if you have a driver for pocket screws use it for the back support. We did not and as a result we had to use about 5 inch screws to attach the back support. 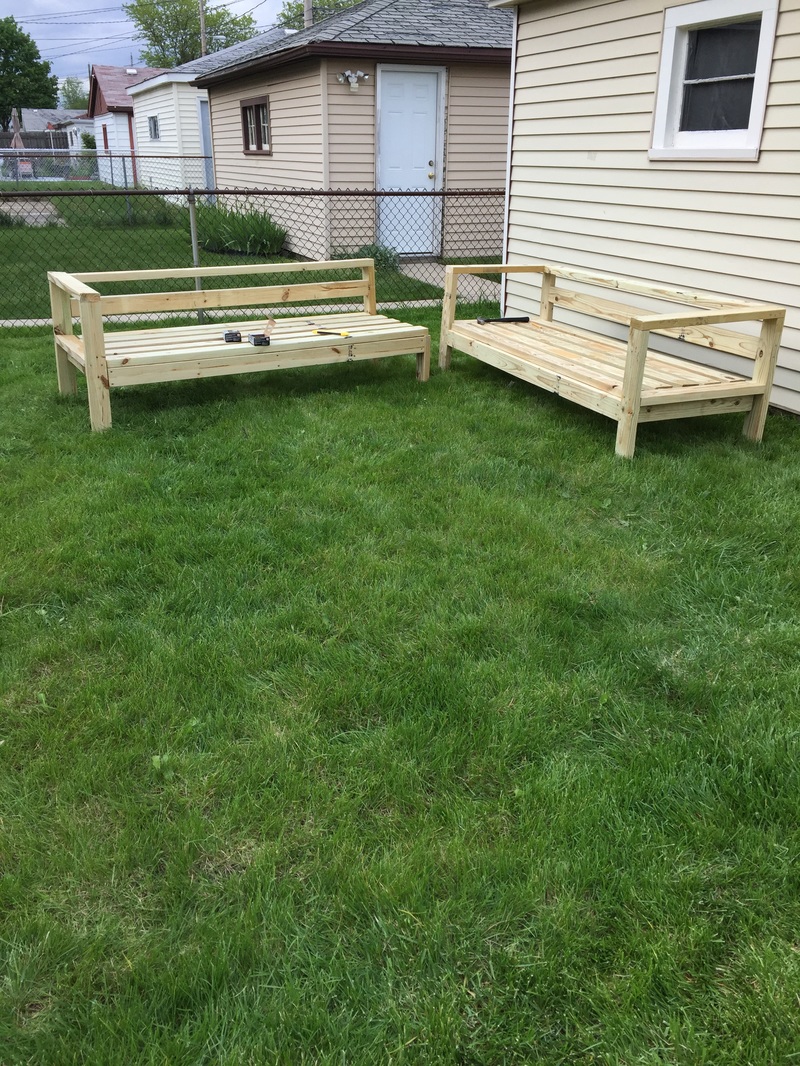 Almost done! After the legs and back supports were added we worked on the sitting area. We spaced the 2x4s about 2inches apart and drilled them into the base. We used about 4 screws for each piece of lumber. We wanted to insure that it was going to be stable. 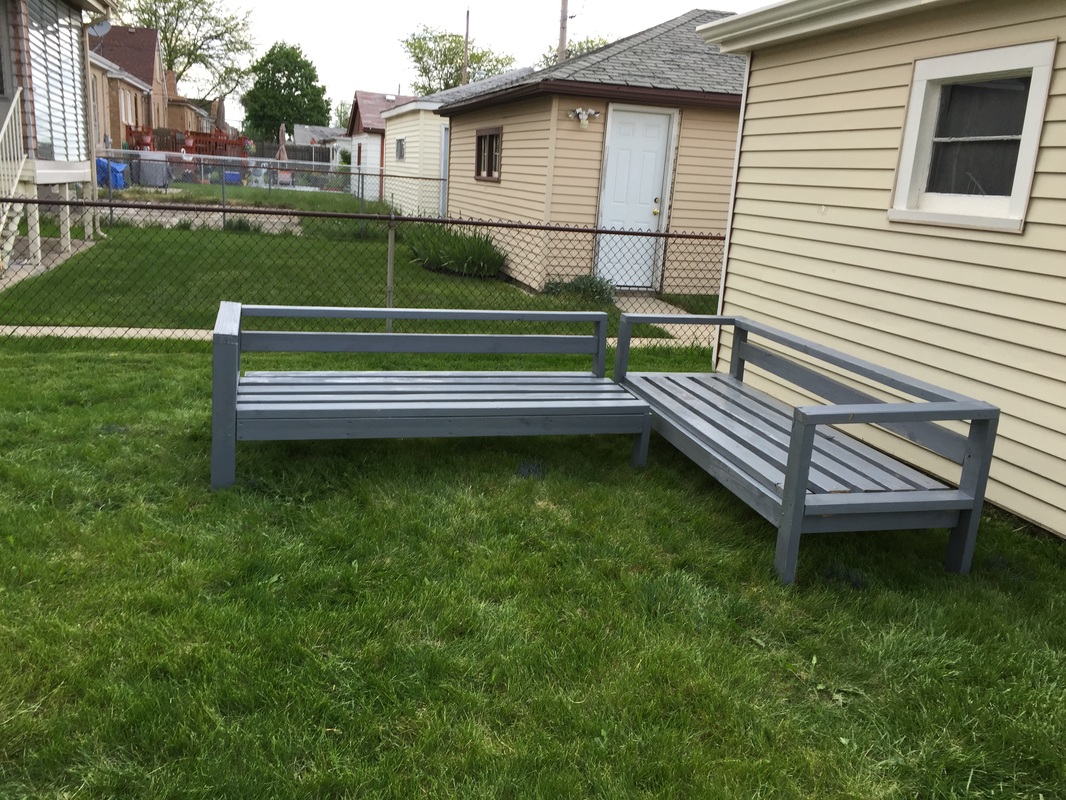 At last we were done building, drilling, and cutting. We stained the bench using a light gray that almost looks blue in person. We used a stain from home depot that was about $10 with tax. We let the stain dry overnight and it turned out beautifully. 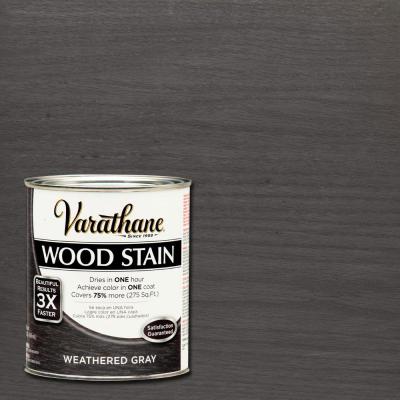 This is the stain that we used. I can say that I really like the way it turned out. 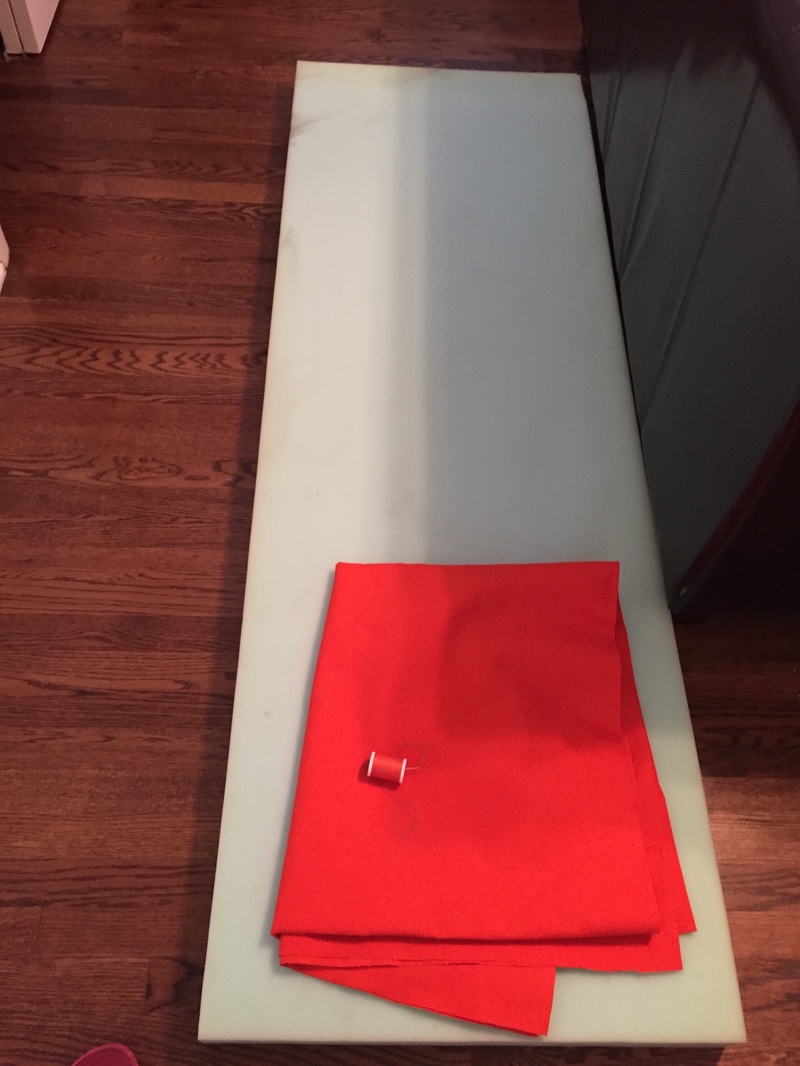 Now on to the cushions. First, I need to say that I am in love with this fabric. I got it from Jo-Ann's on sale for $6.99!! Score! I also had a 20% discount. The total came out to about $60. I brought 9 yards but only needed about 6-7. The foam was $25 and I purchased 4 from home depot. I hand stitched 3 of the 4 cushions and my mom or shall I say design assistant did the last one for me. If you have a sewing machine... honey! Use it!!!! I hand stitched them and my fingers hurt for 2 days after. 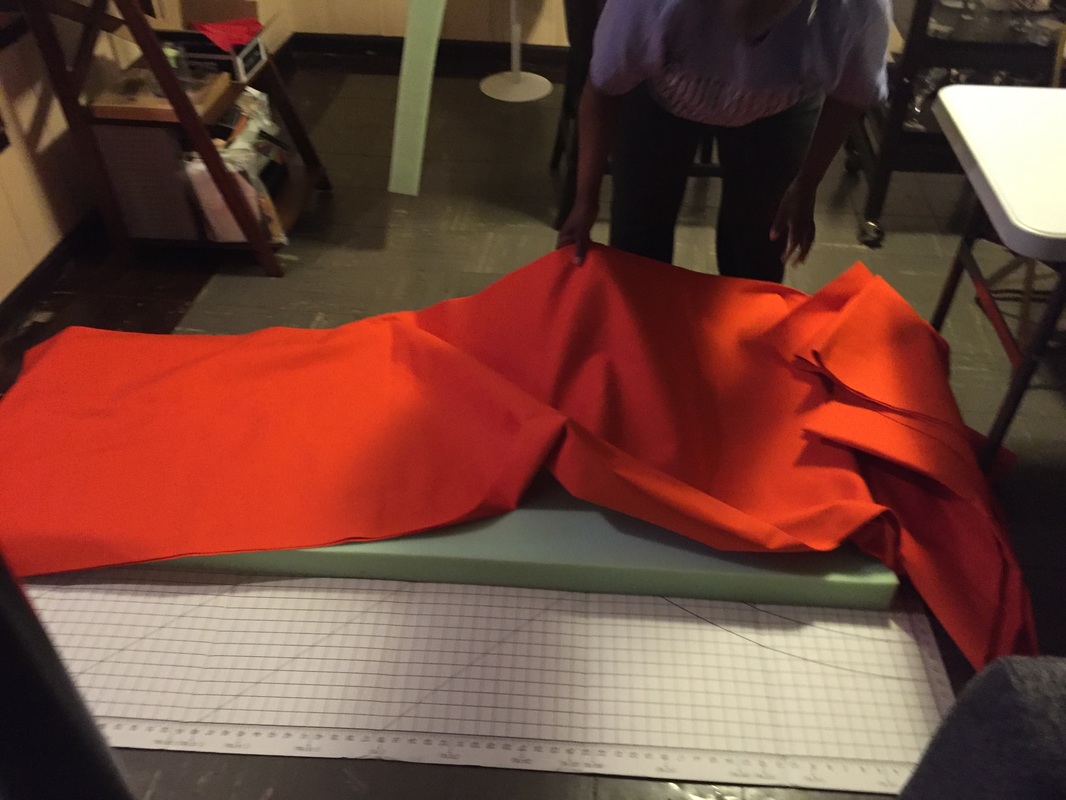 My mom was helping me cut the fabric to fit the foam. I brought too much fabric but that's ok I will make some pillows. I love the boldness of this color. Also, it is important to note that I cut the foam in half for the back support cushion. Cutting foam is pretty difficult. If you have an electric knife I strongly suggest you use that. I used a razor but I was not happy with the rough edges. I hope you enjoyed this post. This was a very fun project. It took about 8 hours to build but it was worth every minute. The memories we have from this will last a lifetime. I hope that you will try to build this also and be sure to tag me on social media so I can see your work!
See ya later!
0 Comments
Leave a Reply. |

Welcome!
Hi I'm Shani! I'm a newlywed that loves Jesus!! I am passionate about living a frugal life style, but still having a beautiful home on a budget, I will show you how to tackle different projects for those starting out with Diy. Archives
January 2020
Categories |
 RSS Feed