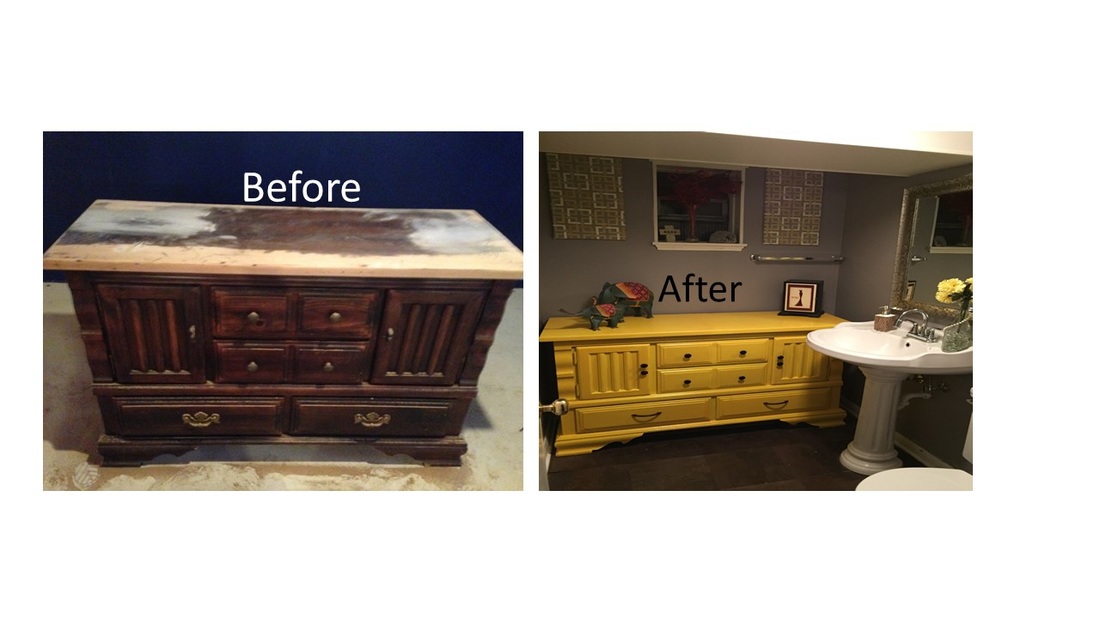
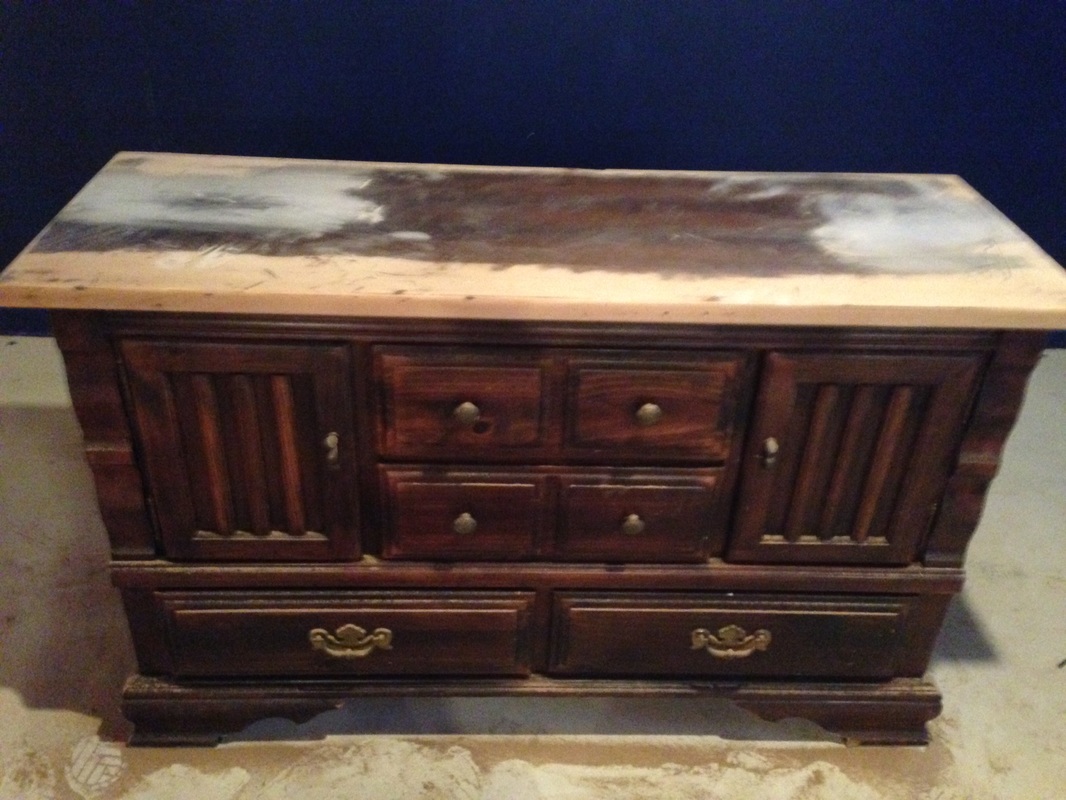
  Hi guys, So I picked up this beauty from the goodwill for $2.99!!!!! Yes! $2.99!! I had to do a double take when I saw this price. It is solid wood and very durable. I cant believe that someone would give this thing away. Let's walk through the process of repurposing this beauty: 1. The first thing I did was wipe the dresser down. 2. Remove all of the hardware with a screw driver. 3. I went on to sand the dresser with my black and decker sander. (This took quite a while). 4. After the sanding was complete I wiped the dresser down thoroughly . 5. Priming was next. Make sure that all of your strokes are as even as possible when you prime. 6. I let the primer dry for about 2-3 hours and then began to paint. (Watch a movie, clean the house, or do something else fun during this time!! ) 7. The paint color I used was Rustoleum Sun Yellow. Here is the link http://www.homedepot.com/p/Rust-Oleum-Painter-s-Touch-32-oz-Ultra-Cover-Gloss-Sun-Yellow-General-Purpose-Paint-1945502/100196452. 8. I brought the hardware from Hobo's. I think I may change out the hardware soon. I want a more glam look for this piece. It probably took me about 2 hours to paint the entire dresser. Put on your favorite tunes or favorite show and get lost in a project like this! Materials you will need: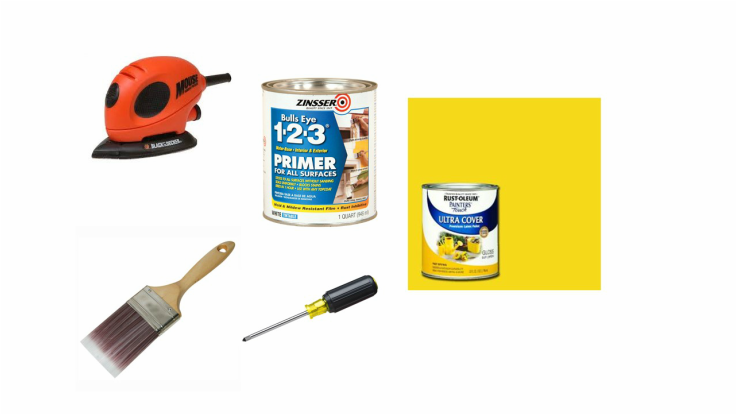 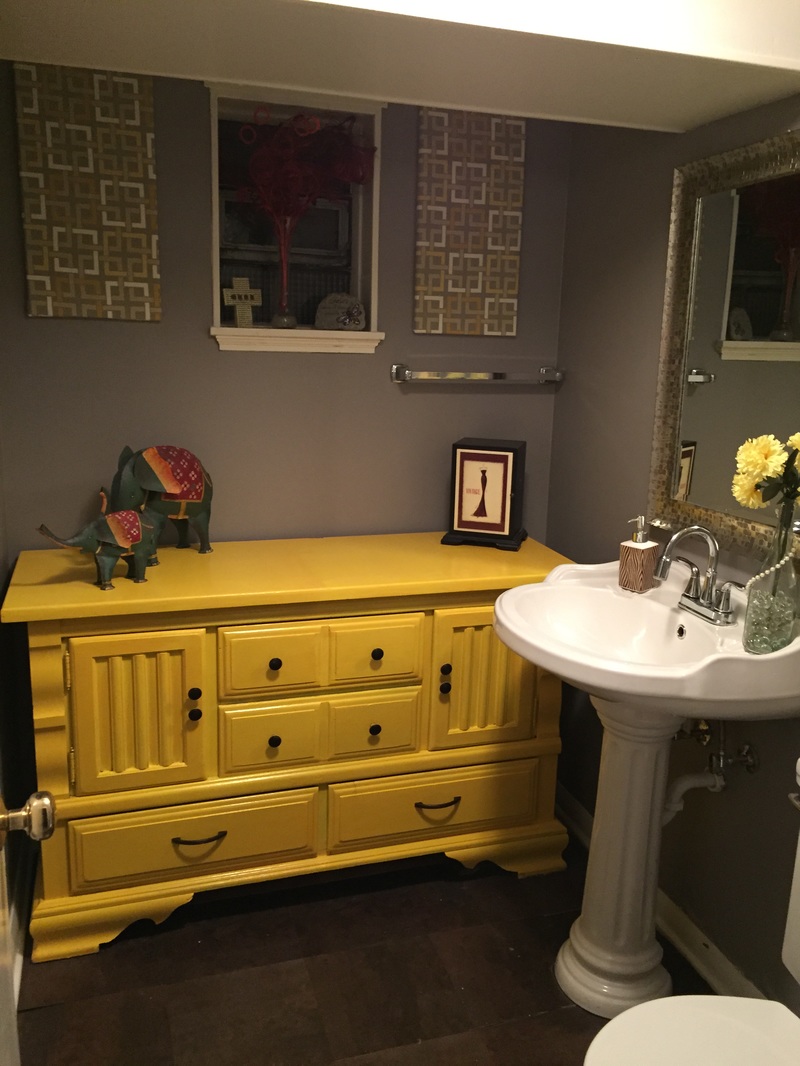 I absolutely love this dresser and the way it turned out. I use it for additional storage in my basement washroom. I thought it would be SUPER cool to put a dresser in the bathroom. This dresser is a conversation piece for sure! People are always shocked and amazed that I put a dresser in the washroom. They are also shocked by the bold color I chose. This is my favorite DIY to date. I love it some much
Comment below and share this on your social media.
0 Comments
Leave a Reply. |

Welcome!
Hi I'm Shani! I'm a newlywed that loves Jesus!! I am passionate about living a frugal life style, but still having a beautiful home on a budget, I will show you how to tackle different projects for those starting out with Diy. Archives
January 2020
Categories |
 RSS Feed